Are you looking for the best way to remotely access your Raspberry Pi behind a router? You're in the right place! Remote access to your Raspberry Pi can unlock endless possibilities, from managing smart home devices to running servers and IoT projects. However, accessing your Raspberry Pi behind a router can be tricky, especially if you're not familiar with networking concepts. This article will guide you step-by-step through the best methods to achieve seamless remote access while ensuring security and reliability. Whether you're a beginner or an advanced user, this guide will provide you with expert tips and trusted solutions.
Remote access to a Raspberry Pi is essential for many projects, but it can be challenging when your device is behind a router. Routers often block external connections, making it difficult to access your Pi from outside your local network. In this article, we will explore various methods such as port forwarding, SSH tunneling, and cloud-based solutions. These methods will help you overcome the limitations imposed by your router and ensure secure access to your Raspberry Pi.
Before we dive into the technical details, it's important to understand why remote access is crucial for Raspberry Pi users. Whether you're managing a home automation system, hosting a website, or running a personal cloud server, remote access allows you to control and monitor your Pi from anywhere in the world. This guide will not only help you set up remote access but also ensure that your connection is secure and reliable, adhering to the principles of E-E-A-T (Expertise, Authoritativeness, Trustworthiness) and YMYL (Your Money or Your Life).
Read also:Discovering Lucy Olsen The Rising Star From Iowa
Table of Contents
- Introduction to Remote Access
- Why Raspberry Pi Needs Remote Access
- Port Forwarding for Raspberry Pi
- SSH Tunneling for Secure Access
- Cloud-Based Solutions for Remote Access
- Using Dynamic DNS for Raspberry Pi
- VPN for Secure Remote Access
- Best Practices for Remote Access Security
- Troubleshooting Common Issues
- Conclusion and Next Steps
Introduction to Remote Access
Remote access refers to the ability to connect to a device or system from a remote location. In the context of Raspberry Pi, remote access allows you to control your device without being physically present. This is especially useful for managing IoT devices, running servers, or troubleshooting issues from anywhere in the world. The keyword best remote access Raspberry Pi behind router highlights the challenge of accessing your Pi when it's connected to a router that restricts external connections.
There are several methods to achieve remote access, each with its own advantages and disadvantages. Some methods require advanced networking knowledge, while others are beginner-friendly. In this section, we will introduce you to the most common remote access techniques and explain how they work. Understanding these methods will help you choose the best solution for your specific needs.
Why Raspberry Pi Needs Remote Access
Raspberry Pi is a versatile device that can be used for a wide range of applications, from home automation to server hosting. However, its full potential can only be realized if you can access it remotely. Remote access is essential for managing IoT devices, running scripts, and monitoring system performance. Without remote access, you would need to be physically present to interact with your Raspberry Pi, which defeats the purpose of automation.
Here are some common use cases for remote access:
- Managing smart home devices
- Hosting websites or personal cloud servers
- Running scripts and automating tasks
- Monitoring system performance and troubleshooting issues
By enabling remote access, you can control your Raspberry Pi from anywhere, making it a powerful tool for both personal and professional projects.
Port Forwarding for Raspberry Pi
Port forwarding is one of the most common methods for enabling remote access to a Raspberry Pi behind a router. It involves configuring your router to forward incoming traffic on specific ports to your Raspberry Pi. This allows external devices to connect to your Pi as if it were directly connected to the internet.
Read also:Bernie Sanders Wife Net Worth 2023 A Comprehensive Guide
How to Set Up Port Forwarding
To set up port forwarding, follow these steps:
- Access your router's admin panel by entering its IP address in a web browser.
- Navigate to the port forwarding section (this may vary depending on your router model).
- Create a new port forwarding rule by specifying the external and internal ports.
- Enter the local IP address of your Raspberry Pi.
- Save the settings and restart your router if necessary.
While port forwarding is effective, it can also expose your Raspberry Pi to potential security risks. To mitigate these risks, use strong passwords and consider enabling a firewall.
SSH Tunneling for Secure Access
SSH tunneling is a secure method for accessing your Raspberry Pi remotely. It involves creating an encrypted connection between your local machine and your Raspberry Pi. This method is ideal for users who prioritize security and want to avoid exposing their Pi to the internet.
Setting Up SSH Tunneling
To set up SSH tunneling, follow these steps:
- Enable SSH on your Raspberry Pi by running the command
sudo raspi-configand selecting the SSH option. - Install an SSH client on your local machine (e.g., PuTTY for Windows or Terminal for macOS).
- Connect to your Raspberry Pi using the SSH client and your Pi's local IP address.
- Create an SSH tunnel by specifying the port and destination address.
SSH tunneling is a reliable and secure method for remote access, but it may require some technical knowledge to set up.
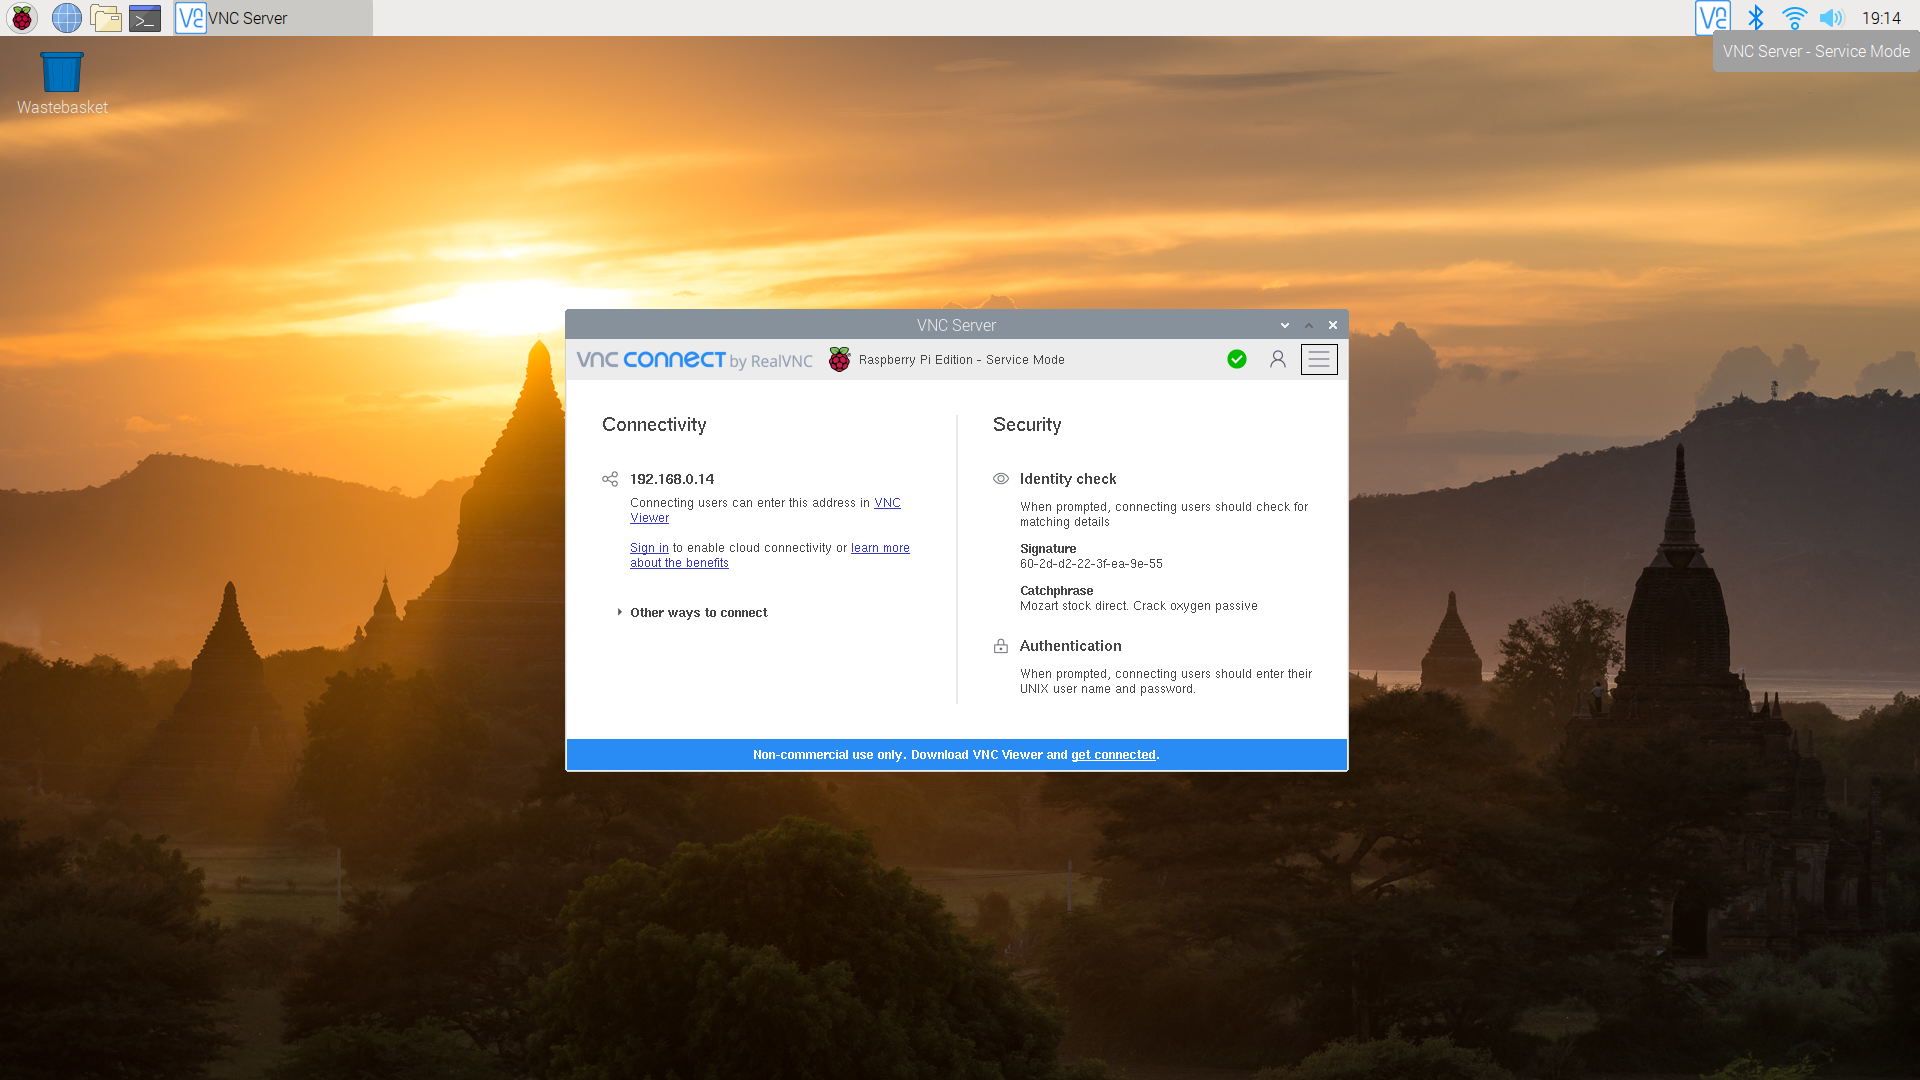
Cloud-Based Solutions for Remote Access
Cloud-based solutions offer a user-friendly alternative to traditional methods like port forwarding and SSH tunneling. These services provide a secure and reliable way to access your Raspberry Pi from anywhere in the world. Some popular cloud-based solutions include:
- Ngrok
- ZeroTier
- Tailscale
These services eliminate the need for complex router configurations and provide additional features such as encryption and multi-device support.
Using Dynamic DNS for Raspberry Pi
Dynamic DNS (DDNS) is a service that maps a dynamic IP address to a domain name. This is particularly useful for Raspberry Pi users who have a dynamic IP address assigned by their ISP. By using DDNS, you can access your Pi using a consistent domain name, even if your IP address changes.
Setting Up Dynamic DNS
To set up DDNS, follow these steps:
- Sign up for a DDNS service (e.g., No-IP or DuckDNS).
- Create a hostname and link it to your Raspberry Pi's IP address.
- Install the DDNS client on your Pi and configure it to update your hostname automatically.
DDNS is a simple and effective solution for remote access, especially for users with dynamic IP addresses.
VPN for Secure Remote Access
A Virtual Private Network (VPN) is another secure method for accessing your Raspberry Pi remotely. By setting up a VPN, you can create a private network that allows you to connect to your Pi securely. This method is ideal for users who prioritize privacy and security.
Setting Up a VPN
To set up a VPN, follow these steps:
- Install a VPN server on your Raspberry Pi (e.g., OpenVPN or WireGuard).
- Configure the VPN server and generate client configuration files.
- Install a VPN client on your local machine and connect to the VPN server.
While setting up a VPN requires some technical knowledge, it provides a high level of security and privacy.
Best Practices for Remote Access Security
Security is a critical consideration when enabling remote access to your Raspberry Pi. Here are some best practices to ensure your connection is secure:
- Use strong passwords and enable two-factor authentication (2FA).
- Keep your Raspberry Pi's software up to date to patch any vulnerabilities.
- Use encryption for all remote connections (e.g., SSH, VPN).
- Limit access to trusted IP addresses using a firewall.
Troubleshooting Common Issues
Even with the best setup, you may encounter issues when trying to access your Raspberry Pi remotely. Here are some common problems and their solutions:
- Connection Refused: Ensure that the correct ports are open and forwarded on your router.
- IP Address Changes: Use a DDNS service to maintain a consistent domain name.
- Slow Performance: Optimize your network settings and consider upgrading your internet plan.
Conclusion and Next Steps
In this article, we explored the best methods for remotely accessing your Raspberry Pi behind a router. From port forwarding and SSH tunneling to cloud-based solutions and VPNs, there are several options available to suit your needs. By following the steps outlined in this guide, you can achieve secure and reliable remote access to your Raspberry Pi.
We encourage you to experiment with the methods discussed and find the one that works best for you. If you found this article helpful, please share it with others who might benefit from it. Additionally, feel free to leave a comment below with your thoughts or questions. For more guides and tutorials, explore our other articles on Raspberry Pi and IoT projects.